Creme Brulee is a beloved classic French dessert, known for its creamy, custard-like texture and that delightful, crisp layer of caramelized sugar on top. What if we told you that there's a way to make this indulgent treat even easier and more foolproof? With the sous vide cooking method, we can achieve a perfectly silky texture every single time without any guesswork. The even, controlled cooking ensures that our custard comes out flawlessly smooth and rich. Ready to make a restaurant-quality dessert at home? Let's get started with this sous vide creme brulee recipe together!

Why Sous Vide Works for Creme Brulee
Why should we choose sous vide for making creme brulee? Traditional methods involve baking the custard in a water bath in the oven, which can be tricky. The edges often cook faster than the center, making it easy to accidentally overcook. Using the sous vide method, however, ensures a perfectly even cook, resulting in a creamy, smooth custard every time. Plus, there's no need to fuss with a water bath in the oven!
Here are a few more benefits of sous vide creme brulee:
- Consistent texture: No more lumpy or curdled custard.
- No babysitting: Set the sous vide machine and forget it until it's done.
- Precision: The temperature control means the custard won't overcook, no matter how long you leave it in.
Sous Vide Creme Brulee Recipe
Now that we understand why sous vide is the ideal method for making creme brulee, let's get started with the recipe. This recipe serves 4 people—perfect for a small dinner party or a family treat.
Ingredients:
Here's what we'll need to make sous vide creme brulee:
- 6 large egg yolks
- 1 ½ cups heavy cream
- ½ cup granulated sugar
- 1 vanilla bean (or 1 teaspoon vanilla extract)
- Pinch of salt
- 4 tablespoons sugar (for caramelizing the tops)
Equipment:
- Sous vide machine
- 4 small glass jars with lids (like Mason jars, about 4 ounces each)
- Kitchen torch (for caramelizing the sugar)

Step-by-Step Instructions for Sous Vide Creme Brulee
Ready? Let's get cooking!
Step 1: Heat the Sous Vide Bath
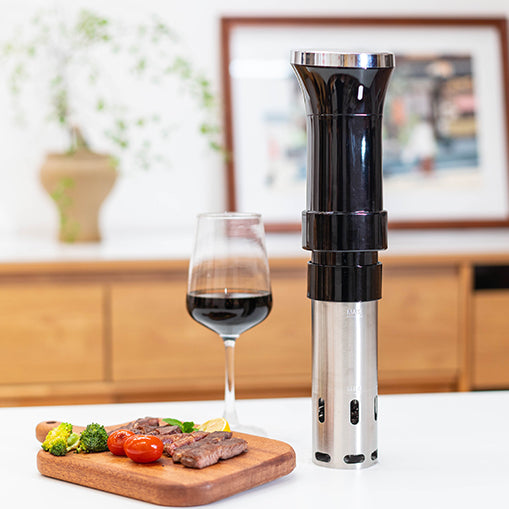
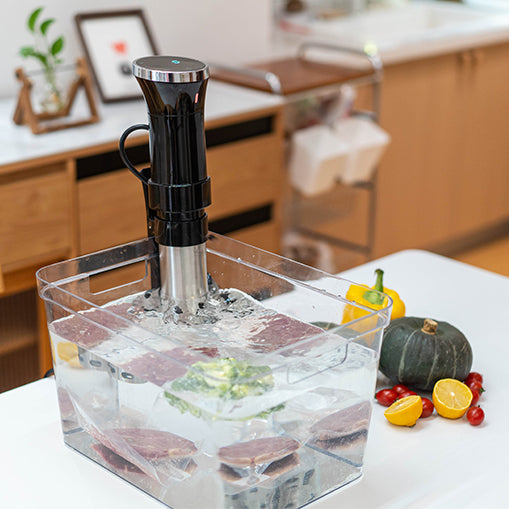
Start by filling a large pot or container with water and set your sous vide machine to 176°F (80°C). The SCHWUA Sous Vide Machine is perfect for this recipe, offering precision temperature control with just a ±0.2°C deviation. This exacting control guarantees the custard will cook evenly and avoid overcooking, ensuring a smooth, silky texture. Plus, with its 3D water circulation system, every inch of your custard will be perfectly cooked, making this machine a must-have for achieving restaurant-quality results at home. While the water heats up, we'll prepare the custard mixture.

Step 2: Prepare the Custard
In a mixing bowl, whisk together the 6 egg yolks and ½ cup of sugar until the mixture becomes pale and slightly thickened. Then, split the vanilla bean lengthwise and scrape out the seeds (or add 1 teaspoon of vanilla extract if you're using that). Add the vanilla and a pinch of salt to the egg mixture.

In a small saucepan, gently heat the 1 ½ cups of heavy cream over medium heat until it's warm but not boiling. Gradually pour the warm cream into the egg mixture, whisking constantly to prevent the eggs from scrambling. We're aiming for a smooth, fully incorporated custard mixture.
Step 3: Pour the Custard into Glass Jars
Now, divide the custard mixture evenly between the 4 small glass jars, filling each about three-quarters full. Lightly screw on the lids, but don't overtighten them. We want a secure seal, but leaving a bit of room for air helps avoid pressure buildup inside the jars during cooking.
Step 4: Sous Vide Cooking
Carefully lower the sealed glass jars into the preheated sous vide bath. Let them cook for 1 hour at 176°F (80°C). Once the time is up, gently remove the jars from the water bath using tongs or a towel (the jars will be hot!) and set them aside to cool.

Step 5: Chill the Custards
Allow the custards to cool at room temperature for about 10-15 minutes before transferring them to the refrigerator. Chill the custards for at least 4 hours, or preferably overnight, to let them set completely.
Step 6: Caramelize the Sugar
When you're ready to serve, it's time for the fun part—creating that signature caramelized sugar crust! Remove the lids from the jars and sprinkle 1 tablespoon of granulated sugar evenly over the top of each custard. Use a kitchen torch to melt the sugar, moving the flame in small circles until the sugar is golden and crisp. If you don't have a torch, you can place the jars under a broiler for a minute or two, but keep an eye on them to avoid overheating the custard.
And there you have it—your perfect Sous Vide Creme Brulee is ready to enjoy!

Tips for Perfect Creme Brulee
To make sure your creme brulee turns out perfectly every time, here are a few helpful tips:
- Preheat your sous vide bath before adding the custards. This ensures even cooking from the start.
- When pouring the custard into jars, leave about ½ inch of space at the top. This prevents spillage and ensures the custard has room to expand slightly during cooking.
- Chill the custard thoroughly before caramelizing the sugar. This helps the custard firm up and makes it easier to get a smooth, crackling top.
- Use a kitchen torch for caramelizing the sugar. It provides the best control and creates a beautiful, even layer of caramel without risking the custard below.
- Experiment with flavors: While vanilla is classic, you can infuse your custard with coffee, citrus, or even a hint of lavender for a unique twist.
Conclusion
Making sous vide creme brulee at home is a foolproof way to achieve that rich, silky texture we all love without the fuss of traditional methods. Whether you’re serving it at a dinner party or treating yourself, this crème brûlée sous vide technique guarantees restaurant-quality results every time. Ready to wow your family and friends? Grab your sous vide machine and let’s get started on this decadent dessert!